EMG-Cleaning-Tutorial
Aus EMG Labor
Before even getting in your first participant: Procedure programming
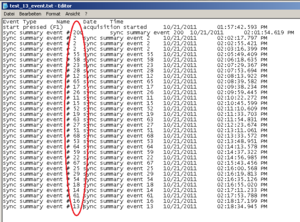
In E-prime or Inquisit, you should make sure that there are marker send to identify each stimuli uniquely or a type of stimuli (several stimuli belonging to the same type getting the same marker).
Running the experiment and recording physiology data using Biolab, an event file for each participant is created showing these very markers, as you can see below. It is written out through Biolab and saved in the same folder as the physiological data. An event marker is named: “sync summary event # 2”. The “2” is the marker you have defined in you experiment program.
Data aquisition completed: Event-file preparation
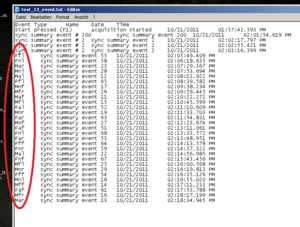
If you experiment used different marker for every stimuli, but for analyses you need to create groups/types of stimuli you can collapse the marker into fewer categories. For doing this make use of the “Mass Search and replace tool” (can be downloaded). E.g. replace the stimuli marker 55 and 65 by the markers that you want to use for analyses.
See Image2 for an example.
See that only the stimuli got a marker, the baseline (event #200) and the practice trials (#2) are not replaced by markers. Now, the EMG program can make use of the markers as a group, instead of having to analyze each stimulus separately.
REMEMBER, make sure each participant has a physiology file (*.mw), a video file (*.avi or *.mpg) and an event file (*.txt).
EMG Data Cleaning
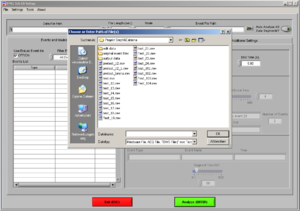
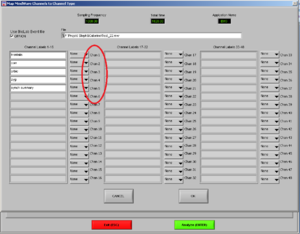
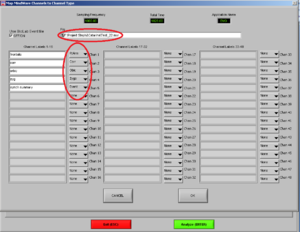
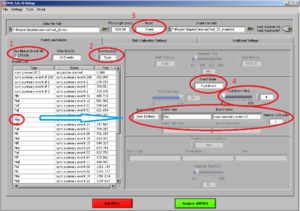
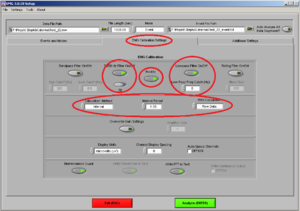
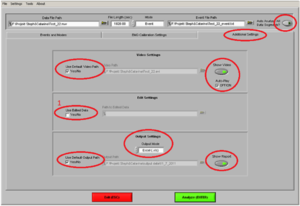
Open the EMG program. Choose the file of the participant you want to analyze (*.mw ).
Now, choose the right names for each channel. Confirm if the document is the right one. Then it will look like Image5.
Note1: The frontalis (OR in other cases the Levator) is named as “RtArm” because the name “Frontalis” (OR Levator) is not in the list.
Note2: don’t forget to put “synch summary” on “Event” as well.
REMEMBER: You need to use this configuration/naming of the channels for each participant!
Press OK.
As a next step, before you start analyzing: Check whether the in the first row of Type an event called “start pressed (F1)” is written. This is the first event of the whole experiment, i.e. it represents the start, with a starting Time of 0.000. It is important that this event is there because all other markers will be placed in relation to start event.
Please also check, whether the time for all markers look normal.
Now you are at Image7.
Make sure of the following things:
• That the “use Biolab event file” box is ticked (1).
• Event label is on “Type”(2)
• Mode: “Event” (3)
Most of the times, we are going to analyze the first four seconds after the beginning to the stimuli. So, choose Mode “Event” and Event mode “post event” and post event time “4” (the time is always in seconds)(4).
Drag the type of event you want to analyze to “Event Type” and verify the number of events of this type you have.
Note: In this case the markers have already been combined and have a name (e.g., Maf). The “Number of Events” show you, how often this type of stimuli has been shown. In this case two stimuli of the same type have been shown.
REMEMBER: Here you need to confirm, that the amount of stimuli shown are in accordance with the amount you specified in the experiment program. If not you should stop here and check what went wrong.
Then click on the tab “EMG Calibration Settings” and make sure it looks like Image7:
Don’t put the Band-Pass-filter if you already have a filter set up on the initial configurations.
• 50/60Hz ON (choose 50Hz)
• Rectify ON
• Lowpass filter ON: Freq Cutofff should be 5 Hz
• Calculation Method: Tells you the time of the interval you want within the time you are analyzing. In this case the interval is 1 second so in each channel you 4 intervals/segments.
• RMS Calculation: Use always “Raw Data”.
• Display Units: microvolts (uV)
• Channel Display Spacing = 0
• "Biomechanics Output" and "Write FFT to Text" (if needed) ON
Then click on the tab “Additional Settings” (Image9)
• Use Default Video Path YES.
• Show video ON
• Auto-Play ON
• If this is the second marker type you are analyzing, or you have opened the file of this participant before and cut in the data, make sure you ALWAYS put the edited .edmg file by making a tick the box at “Use Edited Data” (1)
• Otherwise, you are going to overwrite any changes you already made!!
• Output Mode: Excel.
• Use Default Output Path YES
• Show report ON
• “Auto analyze all data segments” should be ON, if you want to create an output for all stimuli of the same marker at once
You can save these analyzing setting under “Settings” “Save Configurations As”. Here you can open it as well, so you don´t have to check every item each time. But ALWAYS check if you have the “Use Edited Data” box ticked!!)
Click ANALYZE.
Data output in the progam and Excel
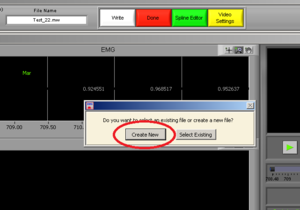
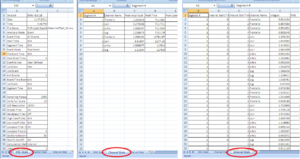
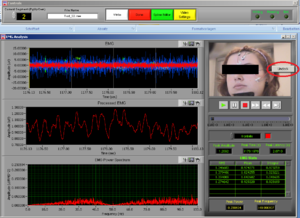
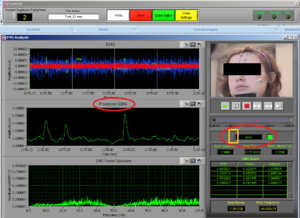
Press “Create New” (Image10). It will open an excel file with all of the information of all channels.
Now the output data are created in the form of Excel Sheets.
• First Excel Sheet: EMG Stats
• Second Excel Sheet: Channel Stats
• Third Sheet: Interval Stats (Image11-13)
Important: Make sure that all channels are being analyzed.
For each channel there should be - in our example of this manual - 4 segments, with Integral, RMS and MEAN. And this for each stimuli (in this case 2)
Verify ALWAYS the 3 sheets!!!
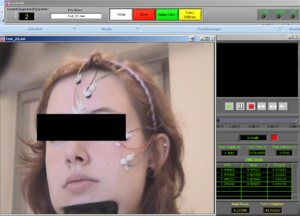
At the same time this screen will open. Press the right button of the mouse on the video to undock it and make the video bigger (Image14).
Place the video over the EMG signal so that you can judge more objectively if there are any artifacts (Image15).
Play all the segments and check here first for artifacts (touching, yawning, swallowing…).
Dock the video back in (right button click of the mouse on the video – “Dock”).
On the right side of the screen you can see which muscle signal is shown in the Processed EMG screen on the left side. With the arrows you can change the muscle that is shown. In the EMG Stats you cansee the channel information of the muscle that is currently selected; in this case it is shown 4 times, once for each time interval of 1 second.
Now check the signals of all the channels. If you did not see any artifacts just see the signals and if everything seems OK it is OK! You can press DONE and save the excel file (see later in this manual).
How to deal with artficats
In case you saw possible artifacts, check the signals of the specific muscles (e.g. orbicularis for a blink) carefully and see where the peak shows and if this matches with the time where you saw the artifact on the video.
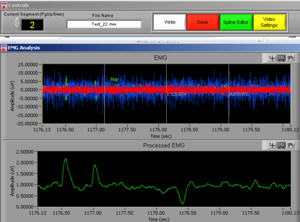
If you want to clean, that is remove, an artifact, note the time of the artifact and press “Spline Editor” in the top of the screen.
Cleaning the data: Spline editor
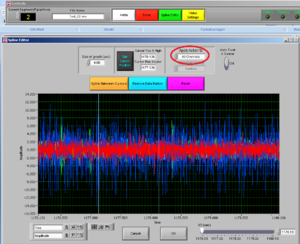
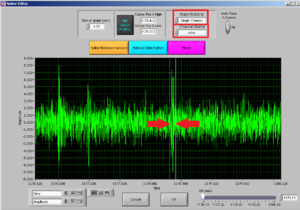
Select if you want to cut all channelsor a single channel; and then choose the channel for the muscle you want to clean.
After choosing the channel you want to clean, choose the interval you want to cut by moving the two cursors.
Note: try to cut the least possible you can: you are losing data! You can always cut more afterwards.
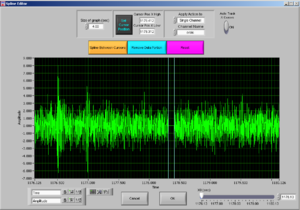
Then press REMOVE DATA PORTION and then OK.
Now it will look like Image19.
Now the peak was cut (that’s why the signal goes down). Then press “Done” and it will adjust the Excel file to the edited data.
Organisation of the folders
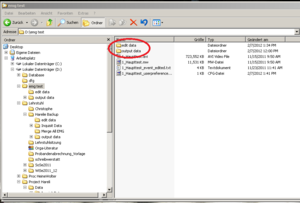
After checking for artifacts every segment click “Done”. A new data file will be created automatically by the EMG program for the edited data; it will be an .edmg file. Make sure these files go into a separate folder (e.g. call it “edited data”). This folder is generated by the EMG program automatically, as well as “output data” (see Image20), within the folder which contains your .mw files.
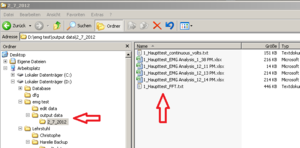
Within the “output data” folder EMG creates a new folder named according to the actual date. Here you will find the Excel sheets you are creating, named by the Experiments name and a timestamp (Image21).
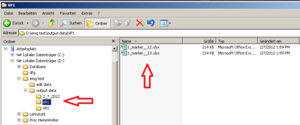
For better arrangement, create a new folder (within “output data”) for each participant and save the Excel Sheets in there renamed, containing VP number and marker type.
Back to the EMG Procedure: Save the open Excel file in a separate Folder for the current participant (as seen above).
REMEMBER: Check in the Excel File for changes after cutting. It can well be, that nothing happens.
Then click “Done”. You´ll be asked to save the edited Data -> click ok (it will be replaced!).
Within the rider “Additional Settings” make sure, that you ticked “Use Edited Data” (to pull the edited .mw file you just created) and click “Auto Analyze all Data Segments”. Click Analyze and “Create new file” (same steps as the initial ones). Now the changes in the Excel sheets should be apparent.
It may well be, that you have to redo these procedure every time you have to remove data portions!!!!
Additional: How to keep an overview of your data cleaning
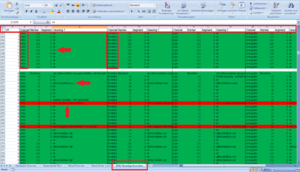
In your Code Book – create a new table “EMG Cleaning Overview”
What to fill in (Image24) ?
a) VP number; b) Channel; c) Marker; d) Segment; e) Cleaning comments
Here you should keep track of what you see and do in the EMG Cleaning. Is the Segment ok? Did you cut anything? Is there something you don´t know what to do with this special artifact? Write everything in the comment column and mark is with either green (everything is ok, even when it is cut), yellow (you are not sure and it should be discussed) and red (not usable due to very long artifacts). It is a lot to write here, but it pays off, because you know exactly where you had problems, others can comprehend your steps; and in case of technical problems you can retrace your work very easily!
Merging
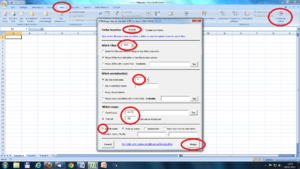
To merge all the excel-files you can use the free “RDBMerge_Add-in” for excel. It’s installed on all Analyzer-PC’s in the lab – if not, you can google it.
Open a new excel-file and start the Add-in (in Data folder). Here you have to choose the folder location, file-extender (xlsx), the worksheet(s) you want to merge and the range (first cell = first data point). Then you get all data from the specified folder in one excel-sheet. The missing subject number you can extract from the imported file-name.
SPSS
coming soon ...


